UV DTF Transfer Stickers - (Magic Film) (Branding & Merchandising)
Step 1. Instant Quote & Order
Templates
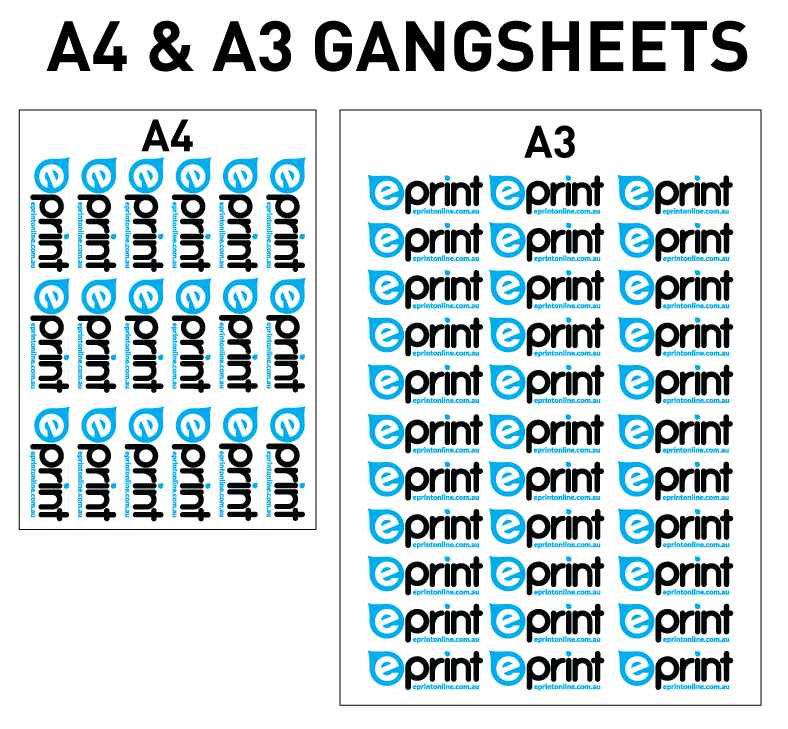
Download free templates to assist you in creating your file.
| Gangsheet Size | Format |
|---|---|
| Gang Sheet Template (A4) | |
| Gang Sheet Template (A3) |
| A4 SHEET: 210 x 297 | A3 SHEET: 297 x 420 mm |
DTF UV TRANSFER STICKERS (GANGSHEET PRINTING)
Simply Peel & Transfer! - Magic Film - Weedless Decals...
(Apply to Almost Any Surface - No Weeding - Full Colour)
*Please note* - This product is tricky to apply for inexperienced users! We highly recommend ordering a sample to try first!
Please click here to read these instructions before ordering!
What is UV DTF Printing?Ultraviolet (UV) DTF (direct to film) Printing refers to a new printing method that uses ultraviolet curing technology to create designs on films. These designs can then be transferred onto hard and irregular-shaped objects by pressing down with fingers and then peeling off the film. UV DTF printing is extremely versatile due to the type of surfaces the designs can go on, some include: metal, leather, wood, paper, plastic, ceramic, glass, etc. These transfers can even be applied onto irregular and curved surfaces! | Why DTF? |
UV DTF - TRANSFER & APPLICATION TIPS
| PREPARATION Ensure you are applying to a clean dry surface, void of any oils or dust Clean the surface with a 95+% Alcohol product to ensure it’s clean | APPLICATION When preparing for transfer always peel the backing sheet away from the image (easiest with the image face down on a flat surface) |
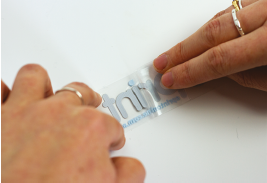
- Hold the image face down, keeping downward pressure on it. Then peel the backing away while also keeping downward pressure on the backing sheet.
- Place the decal in the position you want and rub it onto the surface. A vinyl applicator will help aid the adhesion of the print to your product.
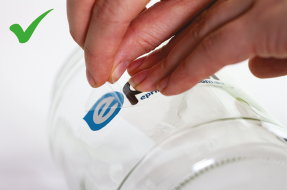
- Once you have made sure the decal is fully adhered, peel back the carrier while being careful in any fine detail areas of the image.
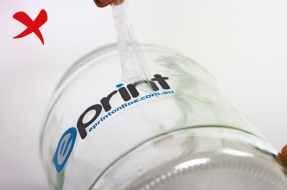
- Do not pull the lamination film upward, use the same technique as above where you peel away while keeping downward pressure on the print.
UF DTF Ordering Online
To apply, simply remove the backing and place the transfer on the cup, ensuring the design is straight and positioned correctly. Rub the design all over with a squeegee/scraper and then slowly peel off the clear film.
Go slowly and do not rush. Allow 48 hours to set before use, and remember - hand wash only! Microwaves and dishwashers are a no-go!
UV DTF transfers stand out due to their thick appearance, as they are made up of 3 layers of ink. Additionally, these stickers have a glossy finish, with the top layer featuring a glossy finish. There is no doubt that this feature makes a big impact when paired with lively colors. This makes them even more eye-catching and attractive.
So, when creating the designs, prioritize colours that are vivid and vibrant.
Apply them to Sturdy and Smooth Surfaces
Due to their thicker material compared to regular paper stickers or vinyl stickers, UV transfer stickers are less flexible, so you should adhere them to solid and smooth surfaces. They work effectively on materials like plastic, glass, and metal.
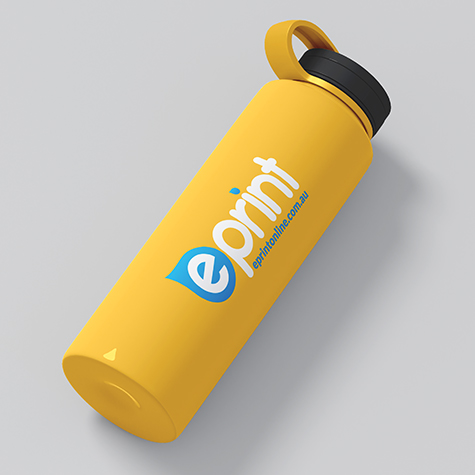
For branding, you can apply these stickers to a variety of objects, including glassware, mugs, tumblers, notebooks, cars, cosmetic bottles, and more. UV transfer stickers almost blend into these items. This gives the impression that they are a part of the product’s design rather than being stickers.
However, you should ensure that the surface is clean and dry before applying them for optimal adhesion.
The 3 Don’ts of Using UV DTF Transfers
The next step in successfully employing UV transfer stickers for branding is to be aware of the factors that may influence the printing, application, and ongoing usage of these stickers. Here are three mistakes you should avoid for optimal results:
1. Don’t use for Designs with tiny details!
When applying the sticker designs onto surfaces, you need to remove the backing layer and apply the transfer tape which holds every detail of the design to your desired surface. Then, you remove the transfer tape to leave only the sticker layer.
Because of these removing steps, choosing tiny details can complicate the printing process and make it difficult to separate and stick them accurately.
To avoid this issue, it is recommended to increase the size of such small elements. You can also increase the line thickness in designs so that you can easily remove the layers without pulling up the sticker when applied.
2. Don’t overcrowd Designs with Information
For UV transfer stickers that are used for branding purposes, they should be concise and visually impactful. Overcrowding the design with excessive information can make it difficult for the message to stand out and may result in a cluttered appearance.
Hence, it is important to prioritize key elements (such as product name, business name, company logo, etc.) and keep the design clean and visually appealing.
3. Don’t apply them without Reading Instructions
Applying UV transfers without reading the instructions can lead to mistakes or damage.
Because of their 3-layer structure and their intricate and distinct elements, applying UV transfer stickers is more complicated than other conventional stickers. Incorrect application can cause some details to be left behind on the backing layer.
Also, UV transfer stickers have a strong adhesion. Carelessly applying can cause the sticker to warp or distort on the applied surface.
Therefore, make sure to take your time to read the instructions provided so that you can apply Transfer Stickers with zero mistake or damage.


![Sticker Sheets [PAPER] (Aesthetic Stickers) Sticker Sheets [PAPER] (Aesthetic Stickers)](https://shop.eprintonline.com.au/images/product/sheet_stickers20.png)
![Sticker Sheets [VINYL] (Aesthetic Stickers) Sticker Sheets [VINYL] (Aesthetic Stickers)](https://shop.eprintonline.com.au/images/product/sheet_stickers2074.png)

