
Artwork Templates
DESIGN TEMPLATES - CANVA
INVITATIONS | FLYERS | BROCHURES | BOOKLETS
TAROT CARDS | GAME CARDS | RIGID BOX TEMPLATES
AESTHETIC STICKER SHEETS
Q: HOW TO DESIGN FOR FOILING (FOIL GUIDE)
Q: HOW DO YOU SET UP CUT LINES (ILLUSTRATOR HELP)
Q: HOW TO USE THESE TEMPLATES
Q: WHAT IS BLEED?
Can't see what you're after? Use the chat below to request a template in real time.
(or see other template options here)
INVITATION PRINTING SIZES:
| TEMPLATE | 5 x 7 |
| TEMPLATE | 4 x 8 |
| TEMPLATE | A4 |
| TEMPLATE | A5 |
| TEMPLATE | A6 |
| TEMPLATE | A7 |
| TEMPLATE | DL |
| TEMPLATE | Square: 148 x 148 mm |
| TEMPLATE | Square: 158 x 158 mm |
FLYER PRINTING SIZES:
| TEMPLATE | A3 |
| TEMPLATE | A4 |
| TEMPLATE | A5 |
| TEMPLATE | A6 |
| TEMPLATE | A7 |
| TEMPLATE | DL |
| TEMPLATE | DOUBLE DL |
BROCHURE PRINTING SIZES:
| TEMPLATE | A3 half fold to A4 |
| TEMPLATE | A4 half fold to A5 |
| TEMPLATE | A5 half fold to A6 |
| TEMPLATE | A4 tri fold to DL |
| TEMPLATE | DOUBLE DL half fold to DL |
BOOKLET PRINTING SIZES:
| TEMPLATE | A4 finish size (210 x 297 mm) |
| TEMPLATE | A5 finish size (148.5 x 210 mm) |
| TEMPLATE | A6 finish size (105 x 148.5 mm) |
| TEMPLATE | SQUARE (210 x 210 mm) |
| TEMPLATE | DL finish size (99 x 210 mm) |
| TEMPLATE | TAROT GUIDE BOOK (70 x 120 mm) |
TAROT CARD PRINTING SIZES:
| TEMPLATE | 70 x 120 mm |
| TEMPLATE | 90 x 130 mm |
GAME CARD PRINTING SIZES:
| TEMPLATE | Trading Card 63 x 88 mm |
| TEMPLATE | Poker Card 64 x 89 mm |
| TEMPLATE | Bridge Card 57 x 89 mm |
| TEMPLATE | Mini Cards 63.5 x 44.45 mm |
| TEMPLATE | Token Cards 70 x 50 mm |
AESTHETIC STICKER SHEET TEMPLATES:
| TEMPLATE | A3 STICKER SHEET |
| TEMPLATE | A4 STICKER SHEET |
| TEMPLATE | A5 STICKER SHEET |
| TEMPLATE | A6 STICKER SHEET |
Using Canva: Print Ready Guide:
Step 1: Go to Canva and create an account.
Step 2: Explore Canva's extensive template options for known products, or, if you find Canva doesn't offer your project idea as a standard option, select "Custom Size"
(it is slightly hidden in the top right of the first menu):

Enter in your finish size dimensions for custom size.
Step 3: Before you begin your design journey, you must first switch on your bleed margin.
To do this, simply go to: File > Show print bleed.
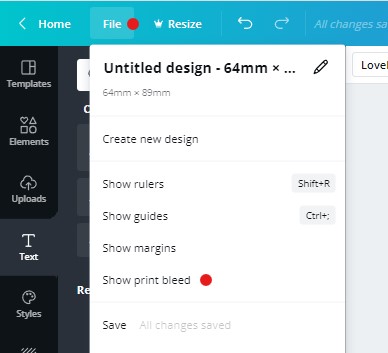
(File: Show print bleed)
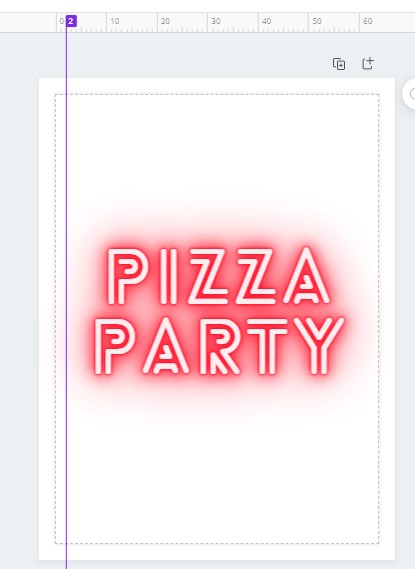
This newly exposed "extra area" is your bleed margin.
This "extra colour" or "extension of your design background" (basically a border around your design),
enables us to cut off the bleed and produce printing with no white edges.
The dotted line below shows the finish size. Outside the dotted line is the bleed zone.
Remember: the bleed area is always cut off
![]()
(blank Canva design ready for use)
Tip 1: Do not add text or images too close to the dotted line.
Always ensure you design at least 2mm away from the trim (see above for safe zone example)
Tip 2: To apply a background to your image, use the background feature.
Do not use images or elements to create a background
They won't automatically fill in the bleed zone like the background function does: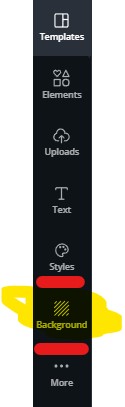
(background function is recommended)
Tip 3: Designing with Borders....
We are a digital printing company, and with digital printing sheet to sheet, side to side....
you can experience what's called "image shift" of up to 1mm in tolerance.
This "creep" can be exacerbated by borders. Borders actually allow the brain to notice tiny variations in out of balance prints.
Thanks to this "border line" acting as a reference so close to the edge, the brain can easily measure this short distance by eye and, effectively making the print seem more out of balance than what it actually is.
For the best print result, it is best to avoid borders altogether. However, due to the nature of some of the products we offer, we're aware of how inherent borders are to the aesthetic of products like trading cards and other.
To minimise the "image shift" focus and not make it so easy for the eye, we have found that borders which are at least 4mm away from the trim, drastically reduces the brain's ability to notice shift.
Extra Tip: Setting up Rulers & Guides in Canva
You can set up theoretical guides using rulers in Canva. File > Show rulers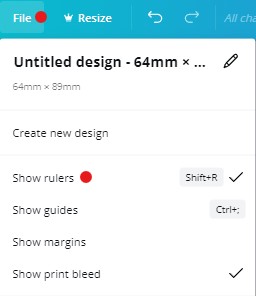
(turn on rulers)
You can now set up guides using the top & side rulers to build safe zones or border zones
Create guide-lines by clicking on the respective side ruler, and dragging the in or down from the top or bottom.
(safe zone example, 2mm from the trim on each edge):

Repeat to build other guides and zones.
Step 4: Download Print Ready PDF file
Canva offers various ways to download your file depending on the application. For us, we need a PDF Print file:
( Share > Download > PDF print )


IMPORTANT: Select: [✔️] Crop marks and bleed

(Download: PDF Print > Crop marks and bleed)
NOTE: Do not download PNG or JPG images, this will kill your quality.
If we receive the incorrect file type, your order will go "on hold" while we wait for the correct file (causing delays)
END