
Artwork Guidelines
What is "bleed"?
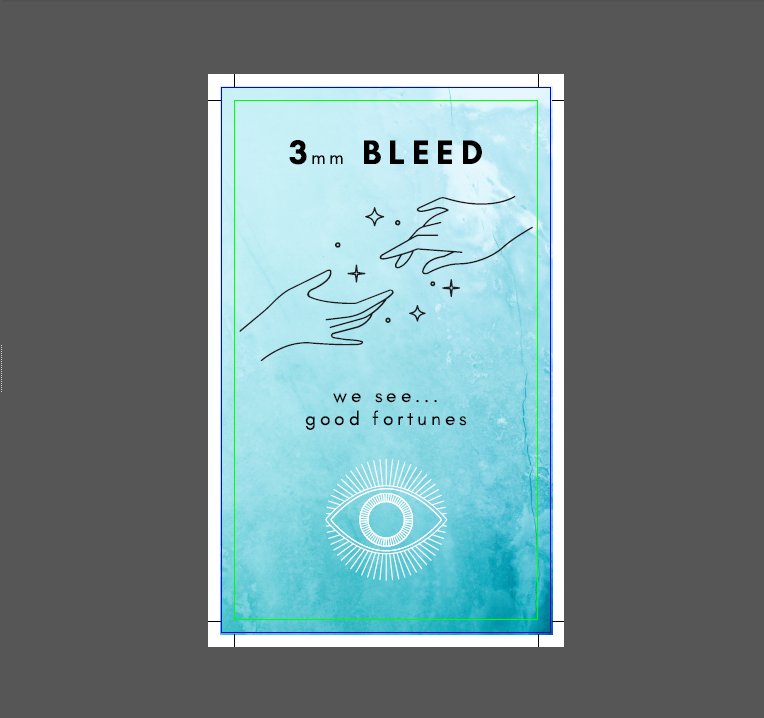
3mm Bleed on all edges applies for most of our products. Bleed is the: extra print area outside the edge trim (cut mark) which gets trimmed off during production to make perfect "colour at the edge" printing.
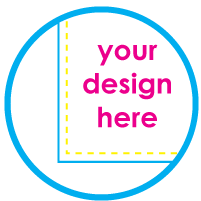
See below... the black crop marks (edge trim line) shows where the cut occurs, and the green box represents the finish size.
DOWNLOAD BLEED EXAMPLE PDF
 =
= 
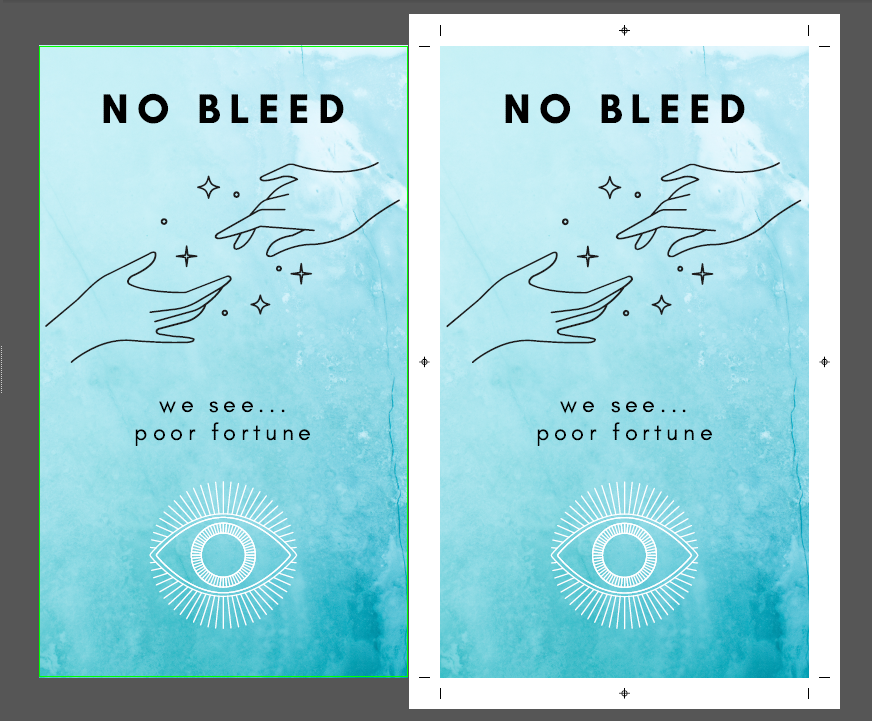
What will happen if we print a run with no bleed?
Cutting down prints that have colour to the edge will never be perfect to the mm because of variation on the printer and cutting machines..
So this means that if there's no extra print outside the trim line, the cutter will likely result in a slither of white edge on top, bottom and/or sides of the finished print.
 =
= 
I need...


BEGINNERS
No experience in graphic design? Don't worry! Try Canva!
Click here for our "how to" guide for using Canva for beginners to ensure your files are print ready!
(INTERMEDIATE / EXPERT DESIGN EXPERIENCE)
Graphic Designer? Your guide to Print Ready files:
| Make sure your artwork is in CMYK (Print) colour mode and not RGB (Screen) colour to ensure the most accurate colour print. Please do not use Pantone (PMS/Spot) colours in your artwork unless you have been quoted for PMS printing. | Convert all your text to outlines so nothing changes when printed. | Make sure your artwork has an extra 3mm of bleed on each side for colour to the edge prints. Anything touching the edge needs to be stretched to the 3mm bleed. |
 | ||
Keep all text and logos inside the safe area (3mm from the trimmed edge on each side) to avoid having anything accidentally trimmed off. | Areas of solid black should be in printer's or rich black (C:60 M:50 Y:50 K:100) for a true black print. | All text needs to be in 100% black (C:0 M:0 Y:0 K:100) for crisp, clean results. |
For Best Results:
 |  |  |
Submit PDF files only. Image files will print at lower quality and cannot be edited or enlarged. | Flatten all layers in your artwork and make sure all text is converted to outline / curves. | Double-check your artwork is in International paper sizes (eg. A4, A3, A5) - not US sizes (eg. 8.5x 11 inches). An Australian business card should be 90 x 55mm. |
 |  |  |
Check out our handy template page and this artwork guide before you start for specifics for your job. | Vector images are best but make sure your images are at least 150dpi resolution and 300dpi for the best result! | When in doubt, get in touch with our friendly staff! We're happy to answer your questions. |
Looking for Something Different?
Some of our specialty finishes, such as foiling, diecuts, spot UV and vinyl cut lettering, and shaped products, such as flag banners and selfie frames, require extra steps or templates to set up as print-ready. For these, we recommend checking out the templates section, the page for that product, or contact us at orders@eprintonline.com.au.
Using Canva: Print Ready Guide:
Step 1: Go to Canva and create an account.
Step 2: Explore Canva's extensive template options for known products, or, if you find Canva doesn't offer your project idea as a standard option, select "Custom Size"
(it is slightly hidden in the top right of the first menu):

Enter in your finish size dimensions for custom size.
Step 3: Before you begin your design journey, you must first switch on your bleed margin.
To do this, simply go to: File > Show print bleed.
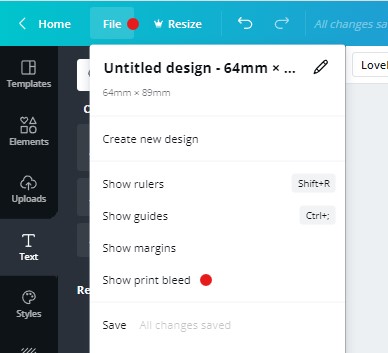
(File: Show print bleed)
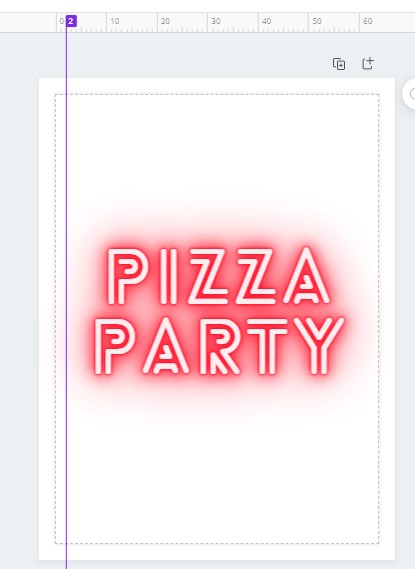
This newly exposed "extra area" is your bleed margin.
This "extra colour" or "extension of your design background" (basically a border around your design),
enables us to cut off the bleed and produce printing with no white edges.
The dotted line below shows the finish size. Outside the dotted line is the bleed zone.
Remember: the bleed area is always cut off
![]()
(blank Canva design ready for use)
Tip 1: Do not add text or images too close to the dotted line.
Always ensure you design at least 2mm away from the trim (see above for safe zone example)
Tip 2: To apply a background to your image, use the background feature.
Do not use images or elements to create a background
They won't automatically fill in the bleed zone like the background function does: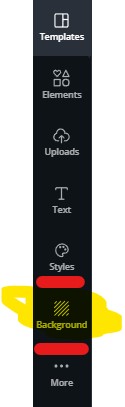
(background function is recommended)
Tip 3: Designing with Borders....
We are a digital printing company, and with digital printing sheet to sheet, side to side....
you can experience what's called "image shift" of up to 1mm in tolerance.
This "creep" can be exacerbated by borders. Borders actually allow the brain to notice tiny variations in out of balance prints.
Thanks to this "border line" acting as a reference so close to the edge, the brain can easily measure this short distance by eye and, effectively making the print seem more out of balance than what it actually is.
For the best print result, it is best to avoid borders altogether. However, due to the nature of some of the products we offer, we're aware of how inherent borders are to the aesthetic of products like trading cards and other.
To minimise the "image shift" focus and not make it so easy for the eye, we have found that borders which are at least 4mm away from the trim, drastically reduces the brain's ability to notice shift.
Extra Tip: Setting up Rulers & Guides in Canva
You can set up theoretical guides using rulers in Canva. File > Show rulers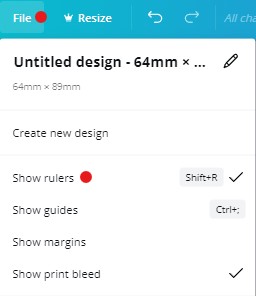
(turn on rulers)
You can now set up guides using the top & side rulers to build safe zones or border zones
Create guide-lines by clicking on the respective side ruler, and dragging the in or down from the top or bottom.
(safe zone example, 2mm from the trim on each edge):

Repeat to build other guides and zones.
Step 4: Download Print Ready PDF file
Canva offers various ways to download your file depending on the application. For us, we need a PDF Print file:
( Download > PDF print )
IMPORTANT: Select: [✔️] Crop marks and bleed
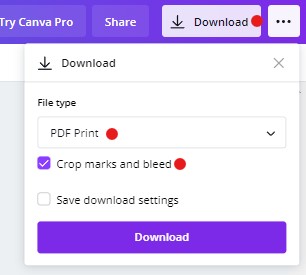
(Download: PDF Print > Crop marks and bleed)
NOTE: Do not download PNG or JPG images, this will kill your quality.
If we receive the incorrect file type, your order will go "on hold" while we wait for the correct file (causing delays)
END